
Level: Beginner (for beginner cardmaker who are just starting and do not have a lot of tools nor a die cutting machine)
Tools Used:
Materials Used:
1 sheet - 8.5”x 11” Bazzill Classic White Cardstock
1 sheet - 12”x 12” Bazzill Aruba
1 sheet - 12"x 12" Bazzill Classic White Cardstock
1 sheet- 12”x 12” Pattern Paper – Dab of butter by Doodle Bug
1 sheet – 12”x 12” Pattern Paper – Cupcake Cuties by Doodle Bug
1 package – Made with Love Stickers by Doodle Bug
1 sentiment – Happy Birthday
Let us Get Started!
Step #1

Cut your 11”x8.5” Bazzill classic white cardstock to 11” this will remove the company product information
Step #2

Cut to 5.5” which is exactly in half. This will give you 2 card bases for A2 cards.
Step #3

Score the long side of the 11” x 5.5” card base at 4.25”.
Then fold base in half this created your A2 card blank.
It should look like this!

Step #4
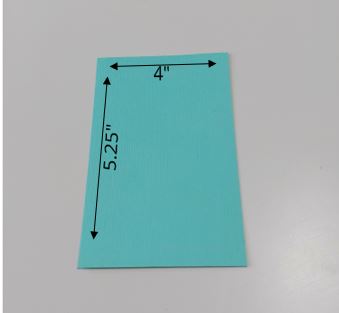
With your 12”x12” sheet of Aruba cut a 4” strip.
Take the 4” strip and cut to 5.25” in length.
Keep left over piece to use for other matting pieces for this card.
Step #5

Center & Glue your 4”x 5.25” piece to the front of your A2 card base.
This will give you a 1/8” border around your card.
Step #6

Cut these pieces as per picture and the quantities. These with matte your pattern paper and white pieces in the upcoming instructions.
Step #7

Cut the pattern pieces to the dimensions shown in picture.
Step #8

With Classic white cut the pieces and quantities according to the picture.
Step #9

Grab your white 2.25” x 0.75” piece.
Using your acrylic block or stamp platform, center & stamp with your favorite color of ink.
I like to use an archival ink with my sentiments as they dry fast, clear, and in this case used Memento Tuxedo Black.
Step #10

You are now going to glue your pattern, white squares and sentiment to the matting coordinating pieces. Use picture for reference.
Step #11

Grab your card base already prepared in step #5
Center & Glue your pattern piece with measurements of 3.75” x 5” to your card leaving a 1/8” border.
Step #12

Step #13

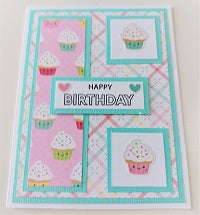
Stick your sentiment on your card centering to your liking.
Place stickers of your choice on the white squares, and I added 2 little hearts on the sentiment.
Step #14

The paper used on this card was inspired by a great friend who brought me cupcakes for my birthday recently! I enjoyed creating this card for the beginners without a lot of tools or supplies but it's also great for the experienced for the layout when you need to make a card fast!
Comments